


Chevrolet Colorado Truck Interior Consoles and Parts
If youre a Chevrolet Colorado truck owner, you likely have pride in your vehicle and want to keep the cab spotless. Chevrolet Colorado truck interior consoles and parts help keep your pickups interior clean and organized. If these parts are missing or become damaged, youll want to learn about the replacement options available to you before making a purchasing decision.
Which consoles are available for the Chevrolet Colorado?There are many options when it comes to replacing or upgrading the consoles and parts in your Chevy pickup. Some accessories you may find that can help you stay organized:
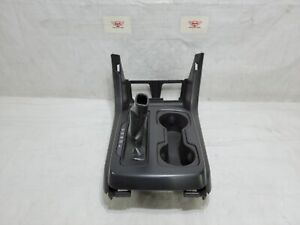
- Center consoles
- Storage trays
- Power outlets
- Underseat storage boxes
- Cargo nets
- Storage bags
- Pet barriers
OEM is an acronym that stands for Original Equipment Manufacturer. Parts labeled with this acronym were made by the manufacturer that initially made those parts for the Chevrolet Colorado. In other words, OEM parts look and function the same as the parts your vehicle came with when it was purchased from the dealership. If you want a direct replacement for a console or accessory, parts with the OEM designation are likely your best bet.
Aftermarket is a term that refers any brand other than the OEM that manufactures parts for the Colorado. Aftermarket parts may look and function differently from Chevrolet OEM parts, but as long as they are listed as compatible with your Chevys make and model year, they should work in your vehicle. If you want to change the look of your vehicles cab or youre looking to add different functionality, then aftermarket parts may be the right option for you.
Keep in mind that unbranded parts are sometimes offered for the Colorado as well, which refers to any part that doesnt carry a brand name.
How do you install a console vault in a Colorado?A console vault is a great option if you have valuables in your vehicle that you want to keep safe. Installing this accessory is a fairly easy process if you follow these steps:
- Remove the back panel of the center console with a plastic prying tool, being careful not to scuff or scratch the console. Starting at the bottom, unsnap the clips holding the panel in place.
- If the back panel contains a USB port, be sure to disconnect the wiring. If it has a power outlet, make sure to disconnect that as well.
- Next, remove the shifter bezel by unsnapping it from the clips holding it in place.
- Open the console and locate its clips by finding the elongated holes. Use your plastic prying tool to unsnap the clips, working back to front, then lift out the console and set it aside.
- Insert the console vault.
- Take the screws provided in your kit and thread them through the holes in your console vault. Use a drill to tighten the screws.
- Put all other components back together in reverse order.